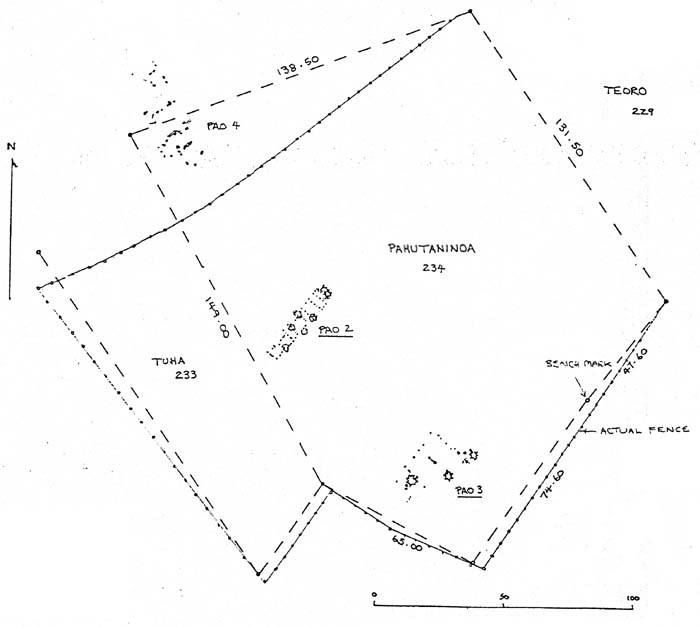
Fig. 8 - PAO 2, 3, 4.


PAO 2, 3 , 4, location map


click here to advance to the next page

click here for the Table of Contents page